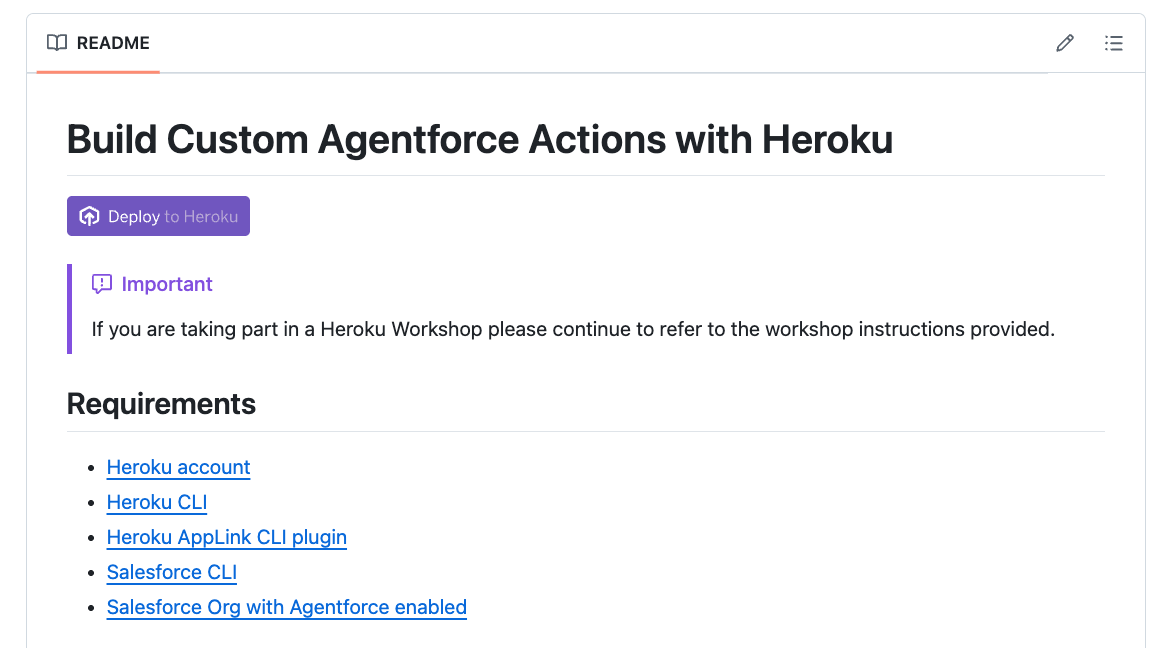
Heroku AppLink and Agentforce Integration
Step 1. Deployment of the Heroku Application
You can deploy the Heroku application from the Heroku Dashboard or from the Heroku CLI.
Deployment from Heroku Dashboard (Recommended)
- Go to the applink-agentforce-workshop repository and click on the Deploy to Heroku button.
Enter a name for your Heroku application, for example username-agentforce-services, then, on App owner select the team-name provided by the instructor and click Deploy. Ignore the warning about the heroku-integration add-on not being available, this is because it is not available to the public yet.
TIP
- Heroku application names must be unique, the username is a proposal to make it unique. eg:
jduque-agentforce-services - team-name will be provided by the instructor
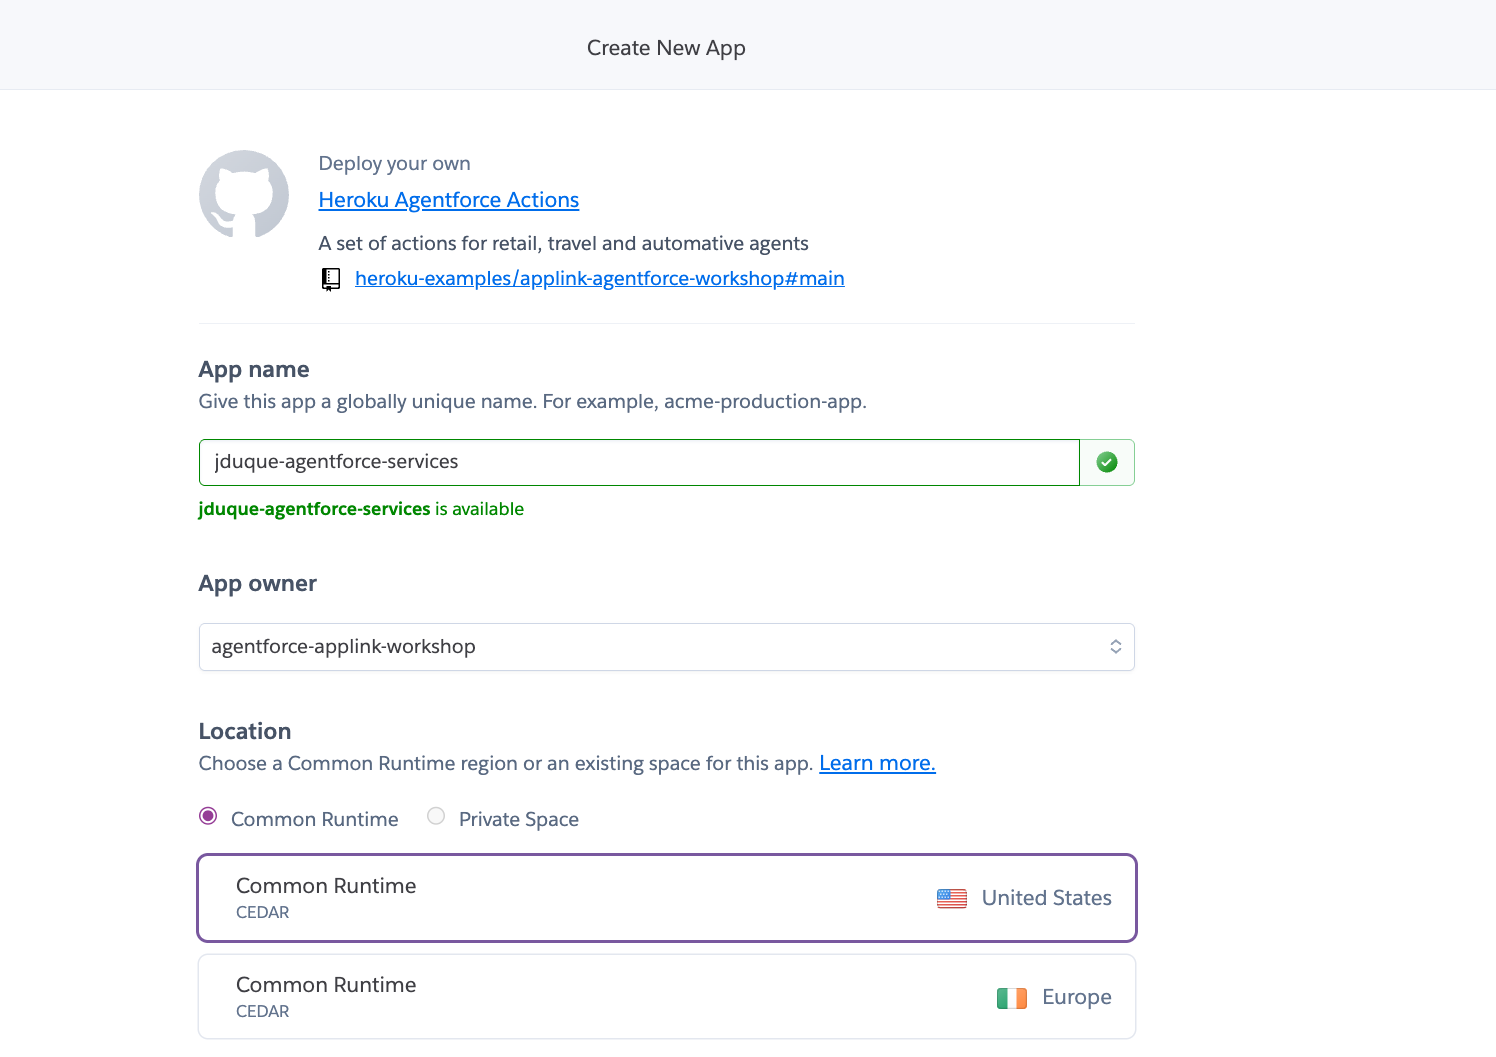
- Heroku application names must be unique, the username is a proposal to make it unique. eg:
Deployment from Heroku CLI (Optional)
Clone this repository:
bashgit clone https://github.com/heroku-examples/applink-agentforce-workshop cd applink-agentforce-workshopLogin to Heroku using the CLI:
bashheroku loginCreate an Heroku application:
bashheroku create <username>-agentforce-services -t <team-name>TIP
Heroku application names must be unique, the username is a proposal to make it unique. eg:
jduque-agentforce-servicesteam-name will be provided by the instructor
Make sure that the git remote is setup:
bashheroku git:remote -a <username>-agentforce-servicesDeploy application to Heroku by running:
bashgit push heroku main
Step 2. Heroku AppLink Add-on Configuration
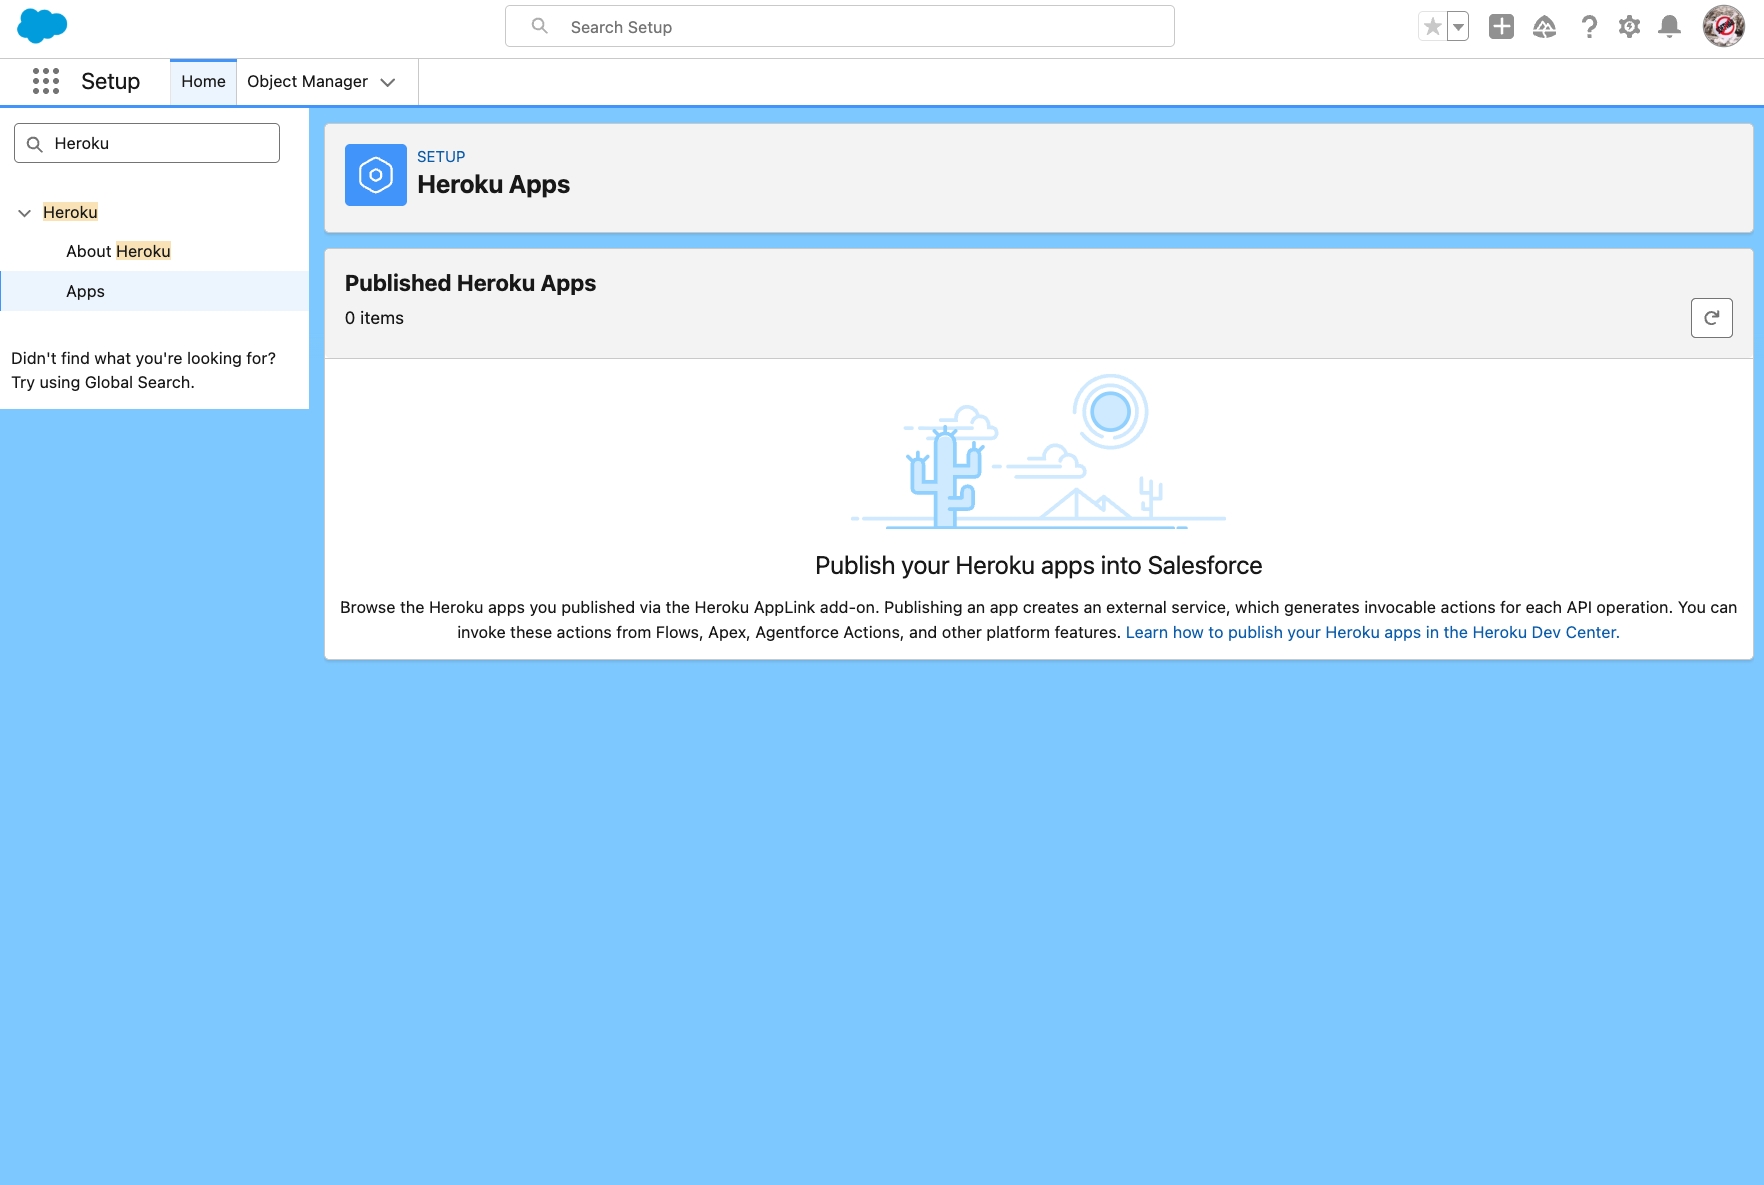
To check that your Salesforce org has AppLink enabled go to Setup > Heroku > Apps
Install the Heroku AppLink CLI plugin:
bashheroku plugins:install @heroku-cli/plugin-applinkProvision the Heroku AppLink add-on:
INFO
ℹ️ This step is not needed if you deployed the application from the Heroku Dashboard
bashheroku addons:create heroku-applinkAdd the Heroku AppLink Service Mesh buildpack to your app:
INFO
ℹ️ This step is not needed if you deployed the application from the Heroku Dashboard
bashheroku buildpacks:add heroku/heroku-applink-service-mesh
Step 3. Assign User Permissions
- From Salesforce Setup, in the Quick Find box, enter and select Permission Sets.
- Select New and give the permission set a name. For example Manage Heroku AppLink.
- Select Save.
- In the Find Settings… box, enter and select Manage Heroku AppLink.
- At the top of the Systems Permissions page, select Edit.
- Select the checkbox next to Manage Heroku AppLink and select Save, and Save again.
- On the navigation bar of the Systems Permissions page, select Manage Assignments.
- Select Add Assignments.
- Select the checkbox next to the user you want to add the permission set to, select Next, then Assign.
Step 4. Connect the Heroku Application to Salesforce
Connect your app to your Salesforce org:
INFO
💡 Make sure to replace
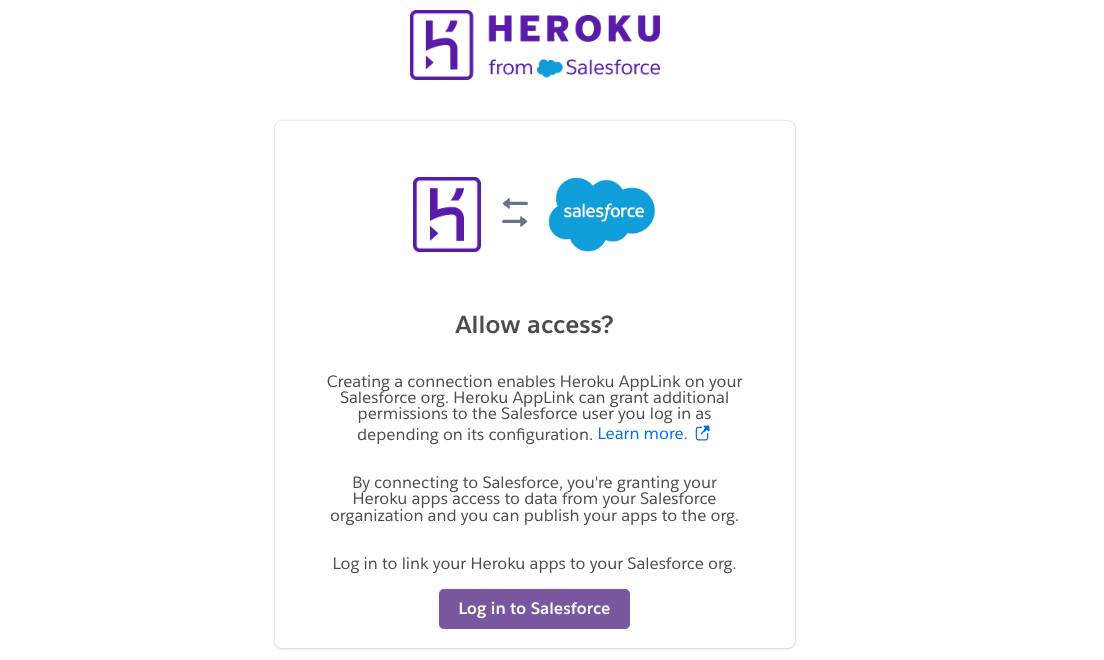
usernamewith the username used in your app name.bashheroku salesforce:connect agentforce-org --app <username>-agentforce-servicesThis will open a browser window to login to Salesforce, use the credentials you obtained for your Salesforce org in the previous steps.
Now in the terminal you should see that the Heroku application is connected to the Salesforce org.

You can also verify the connection by running the following command:
bashheroku applink:connections:info agentforce-org --app <username>-agentforce-services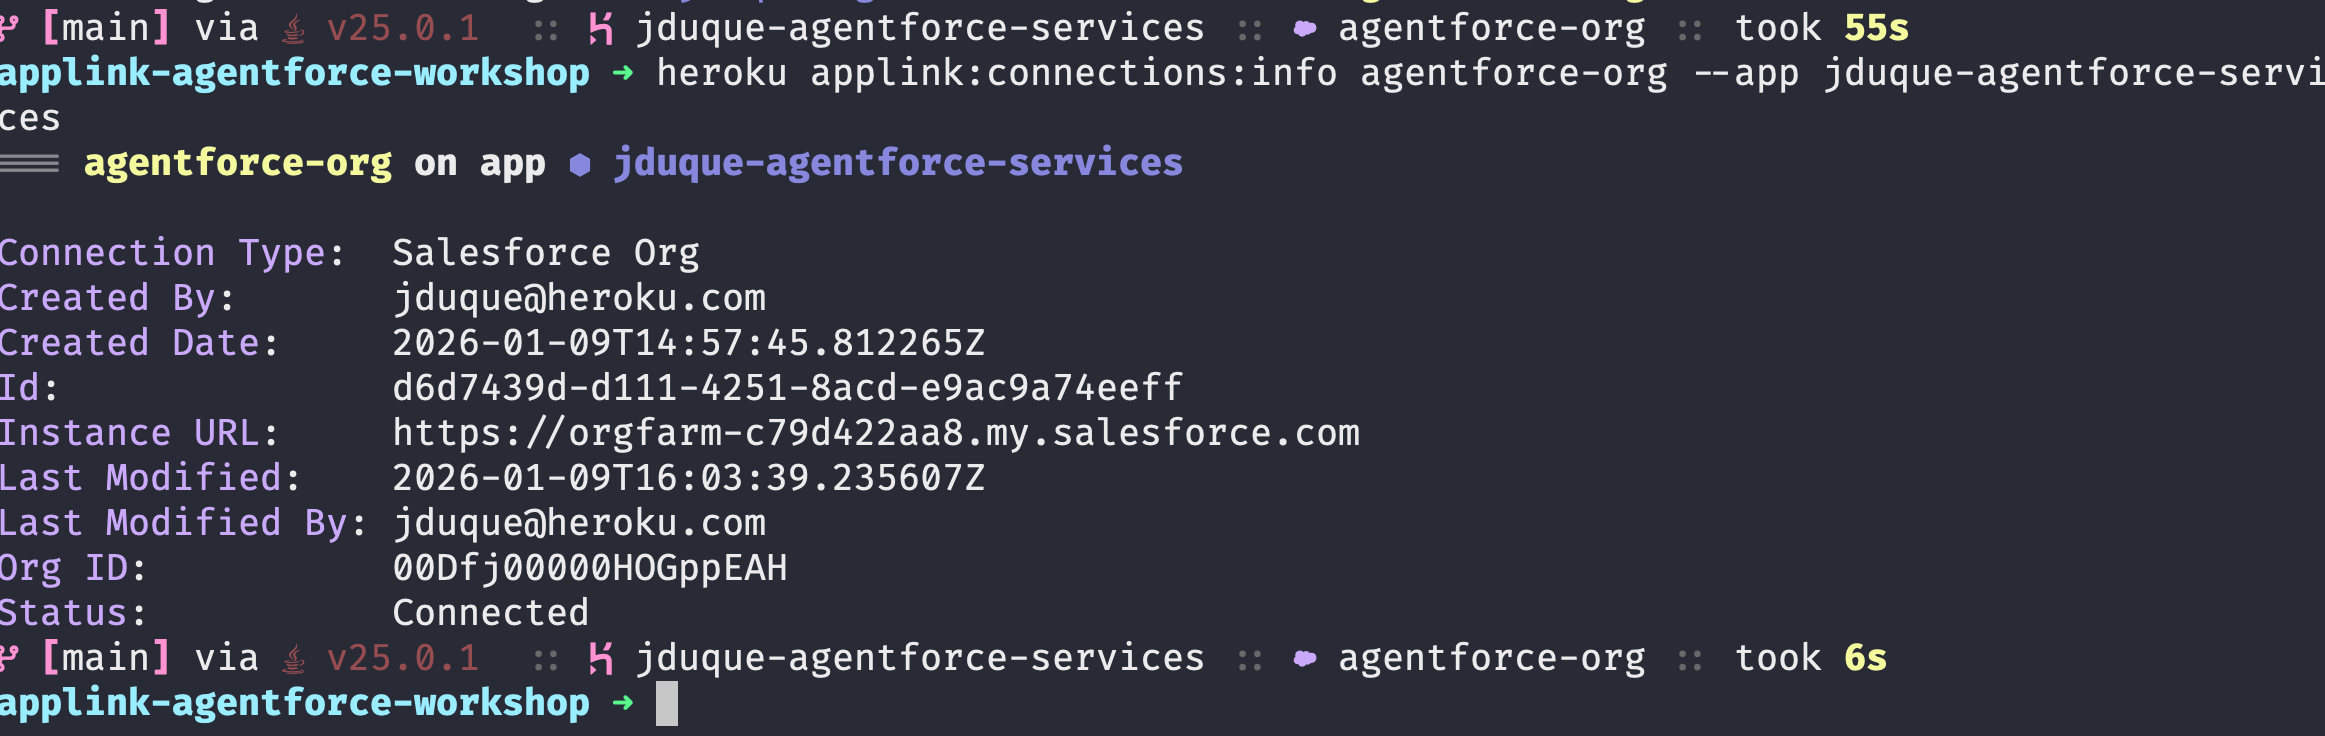
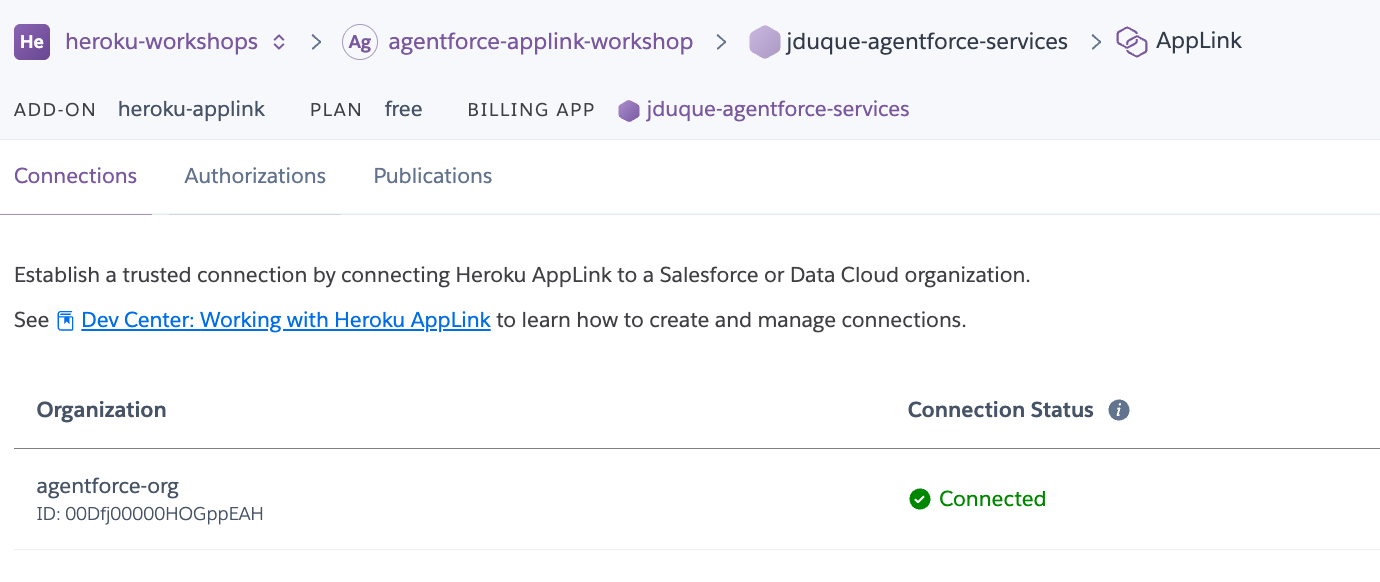
Or by going to the Heroku Dashboard and clicking on the Connections tab in the Heroku AppLink addon page.
Publish the OpenAPI specification to your org as the
ActionsServiceService, run the following command where theapi-docs.yamlfile is located.TIP
💡 The
api-docs.yamlfile is in the GitHub repository, you can download it from api-docs.yaml. If you used the Heroku CLI deployment approach, it will be in the root of the repository you cloned.bashheroku salesforce:publish api-docs.yaml --client-name ActionsService --connection-name agentforce-org --app <username>-agentforce-services --authorization-connected-app-name ActionsServiceConnectedApp --authorization-permission-set-name ActionsServicePermissions
Now the Heroku application is published to the Salesforce org as the
ActionsServiceService.(Optional) Trigger an application rebuild to install the Heroku AppLink buildpack:
INFO
ℹ️ This is not needed if you deployed from the Heroku Dashboard
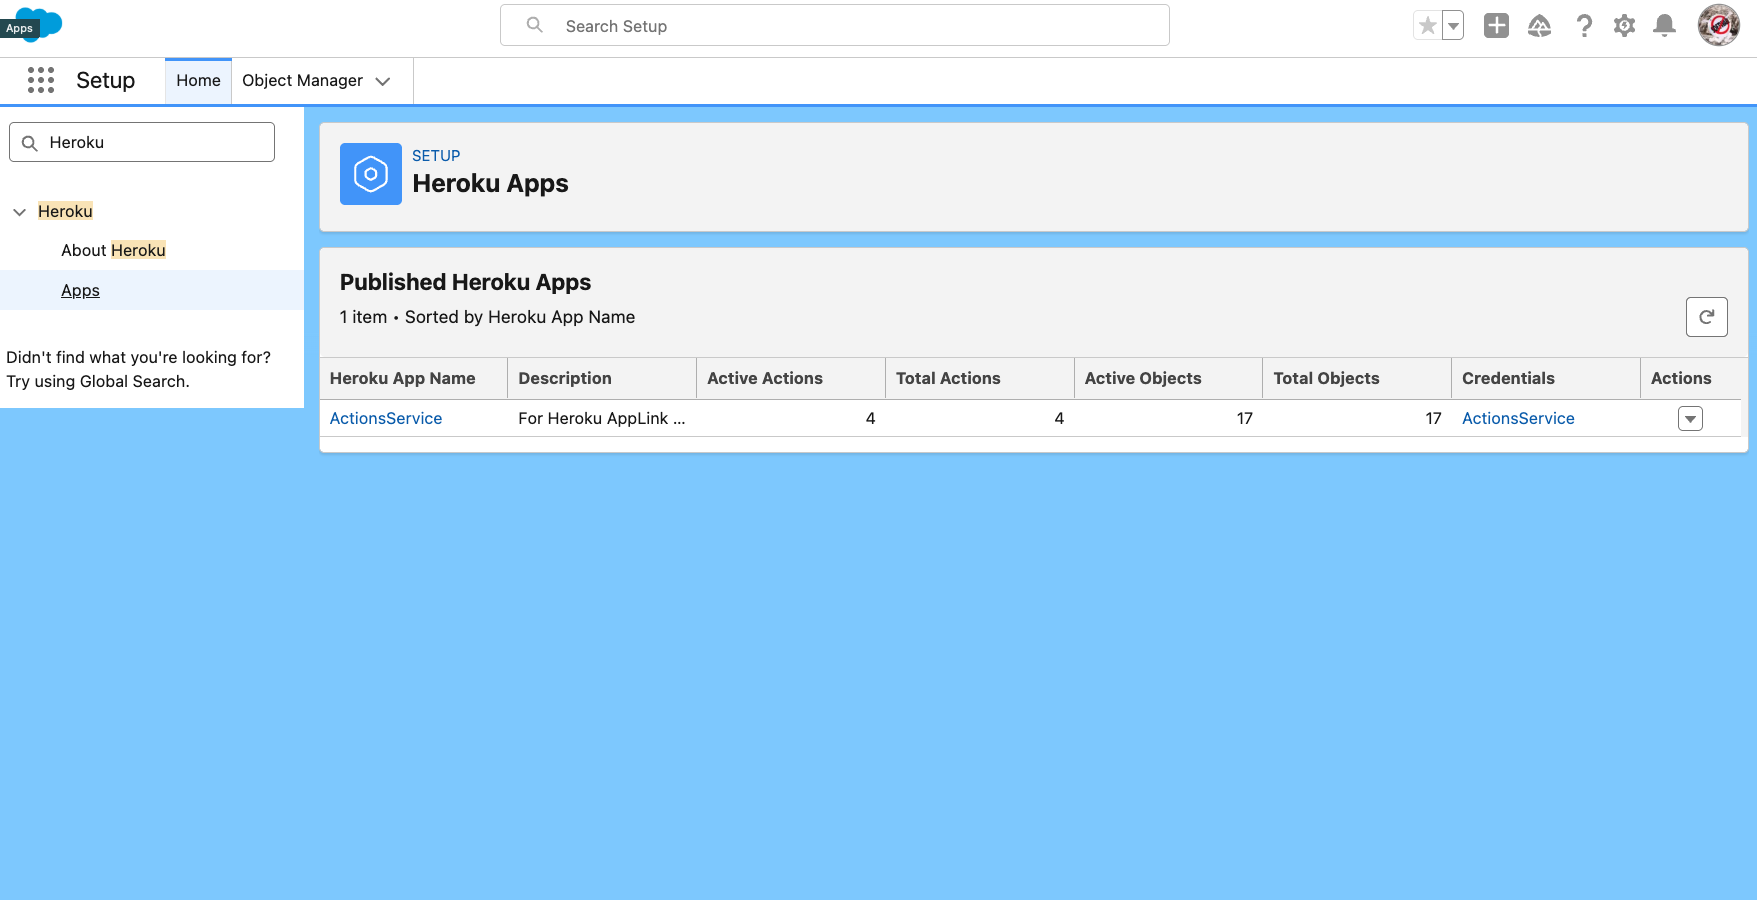
bashgit commit --allow-empty -m "Rebuild app" git push heroku mainVerify that the published service is under Setup > Heroku > Apps
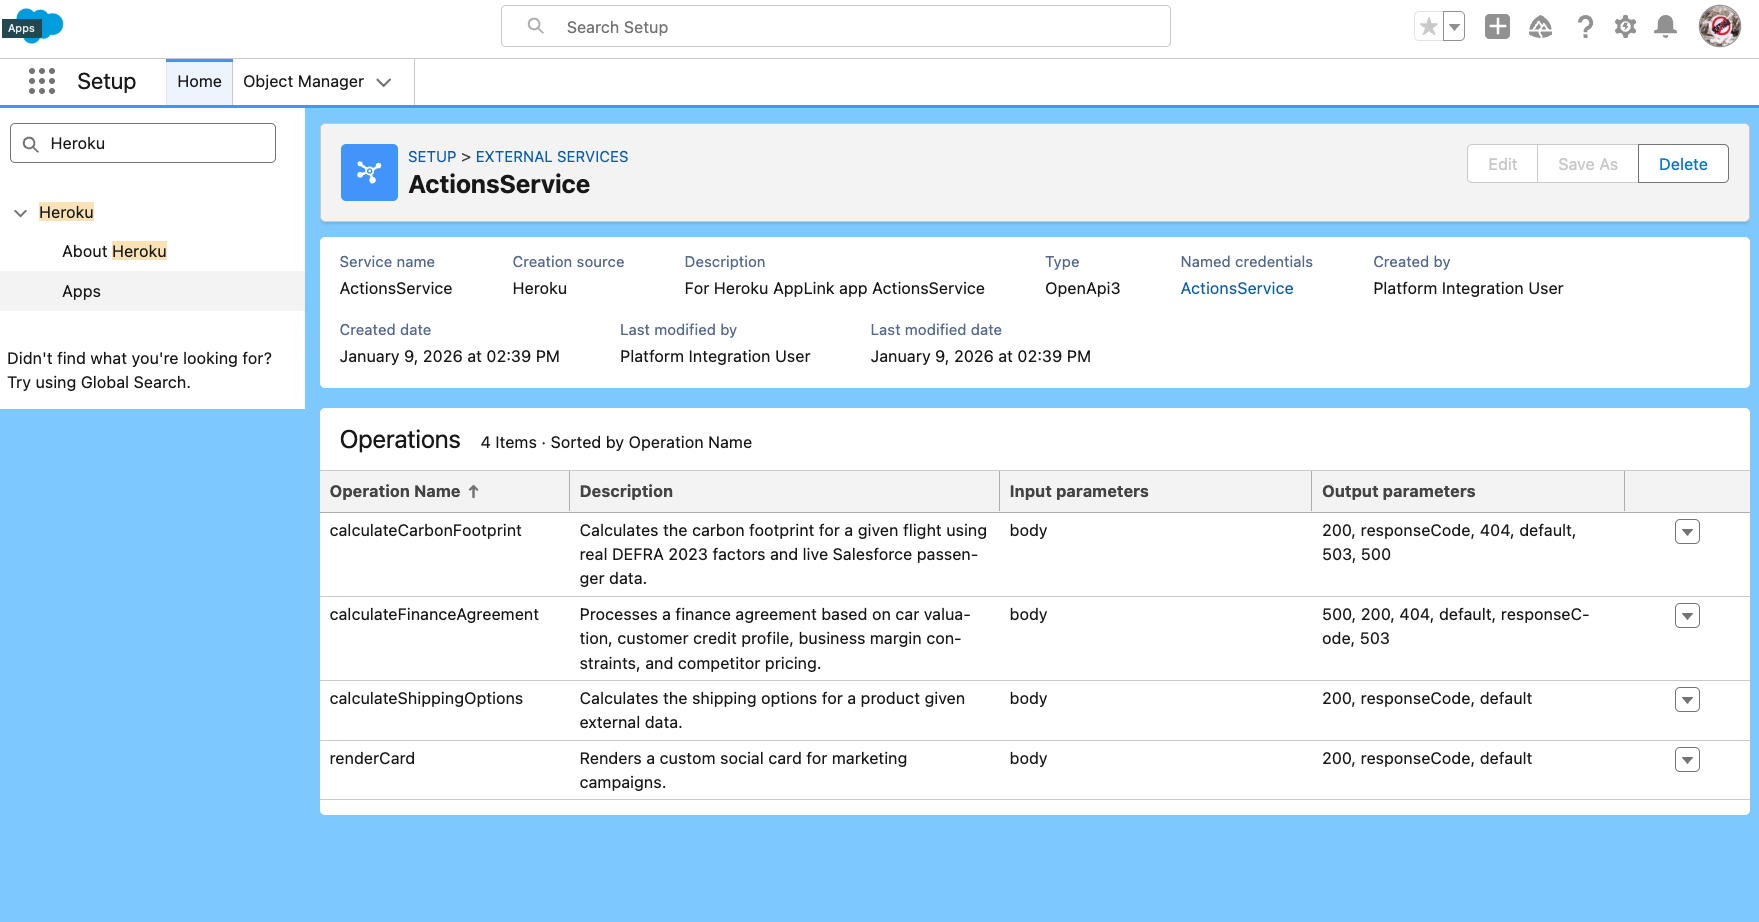
Click on the AgentforceServices service to view the puublished operations.
Step 5. Assign the Agentforce Services Permission Set
- From Setup, navigate to Permission Sets and click on the ActionsService permission set.
- Click on Manage Assignments
- Click on Add Assignments
- Select the EinsteinServiceAgent User profile and click Next
- Click Assign
- Repeat the above steps for the ActionsServicePermissions permission.
Step 6. Enable the User External Credentials permission
From Setup, navigate to Permission Sets and click on the ActionsService permission set.
Click on Object Settings
Click on User External Credentials
Edit the Object permissions and enable the
Readpermission.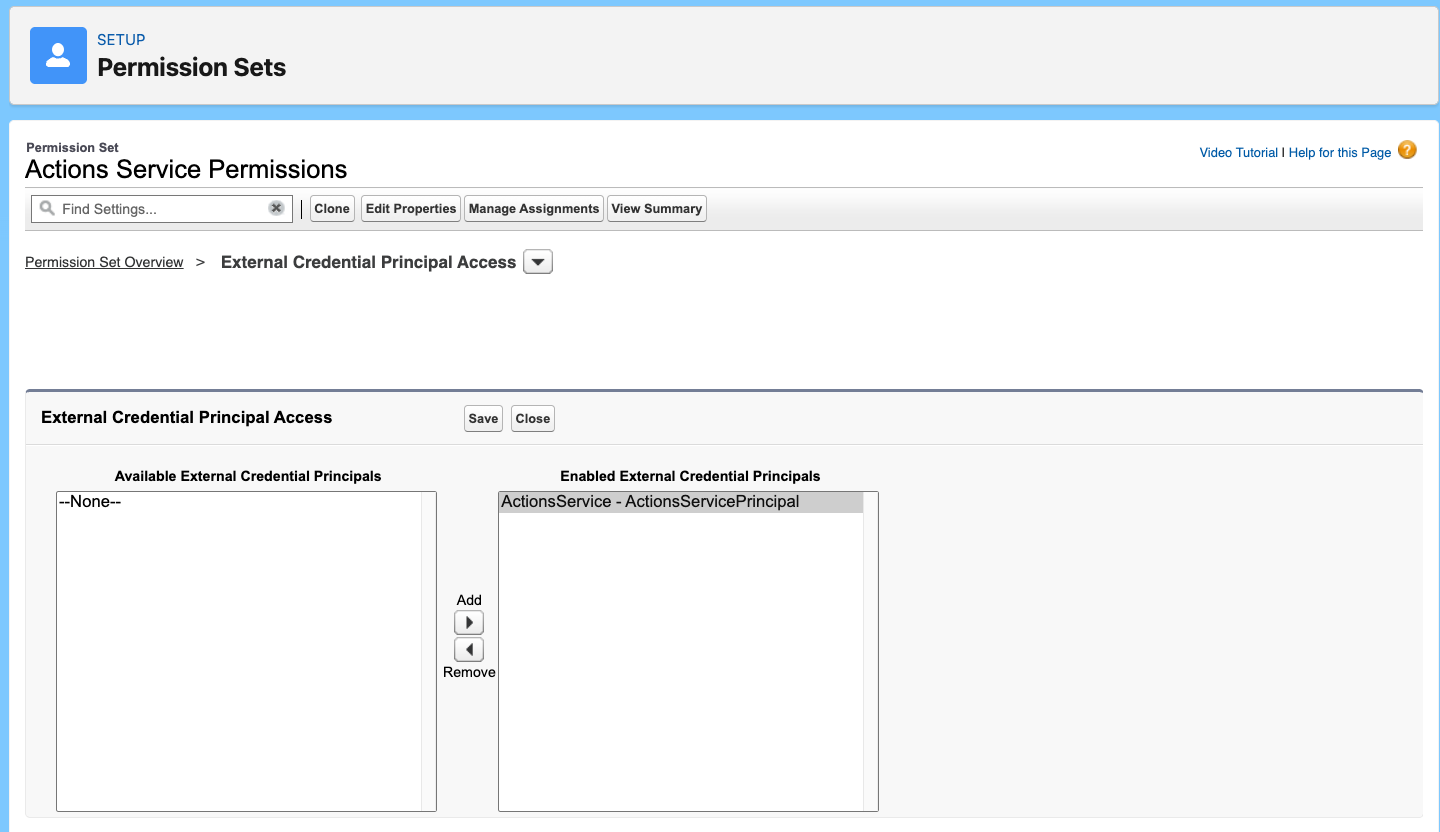
Step 6. Calling the Heroku Application from Agentforce
Create an Agent Action
From Setup, open Agentforce Assets and click on the Actions tab.
Click New Agent Action.
Configure the action as follows:
Field Value Reference Action Type API Reference Action Category Heroku Reference Action Calculate Finance AgreementAgent Action Label Keep the default Agent Action API Name Keep the default Click Next.
Leave in place the default instructions (obtained from the Heroku app API documentation)
Uncheck the Loading Text checkbox
Check Show in conversation in the Output section for the 200 output (This is the success response from the Heroku app)
Click Finish
Step 5. Add the Agent Action to an Agent
From Setup, open Agentforce Agents (under Agentforce Studio).
Click on Koa Cars Dealership Agent in the list of agents.
Click Open in Builder.
Click Deactivate to deactivate the agent if its is Active, so that you can add a new custom action.
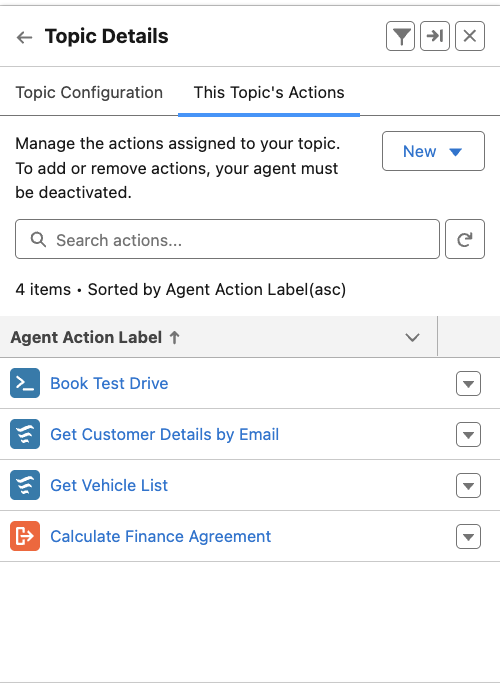
In the Topics sidebar, click the Koa Cars Salea Agent topic.
Go to This Topic's Actions tab.
Select New and from the dropdown list choose Add from Asset Library.
Check the Calculate Finance Agreement action and click Finish.

Confirm the Calculate Finance Agreement action is in the list of actions.
Step 6. Testing the Agent Action
Refresh the Conversation Preview panel click in the top right Refresh icon
In the Conversation Preview panel, enter the following prompt:
txtI want to buy the car with a $1,000 down payment, a max 5% interest rate, and a term over 3 years. Can you provide a competitive finance estimate?The agent will request the contact email:
txtMy email is johnsmith@codey.comThe agent will ask for the car model:
txtI'm interested in the Zig, model M3 car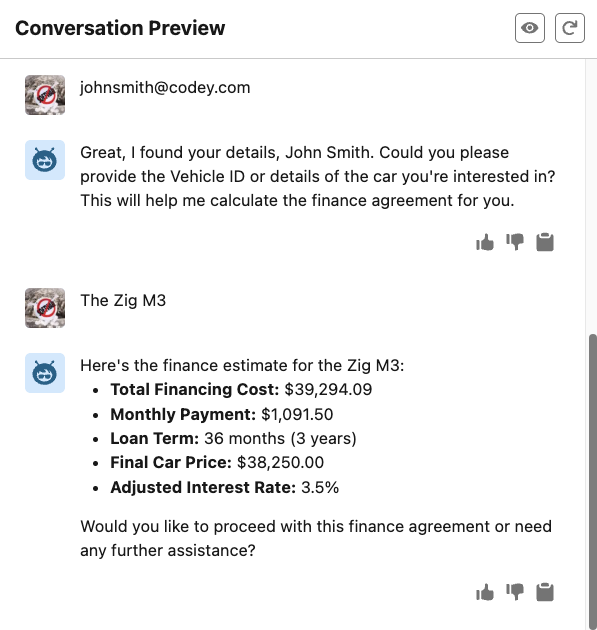
Navigate to the Contact record for
johnsmith@codey.comand click Notes & Attachments to view the finance agreement in PDF form.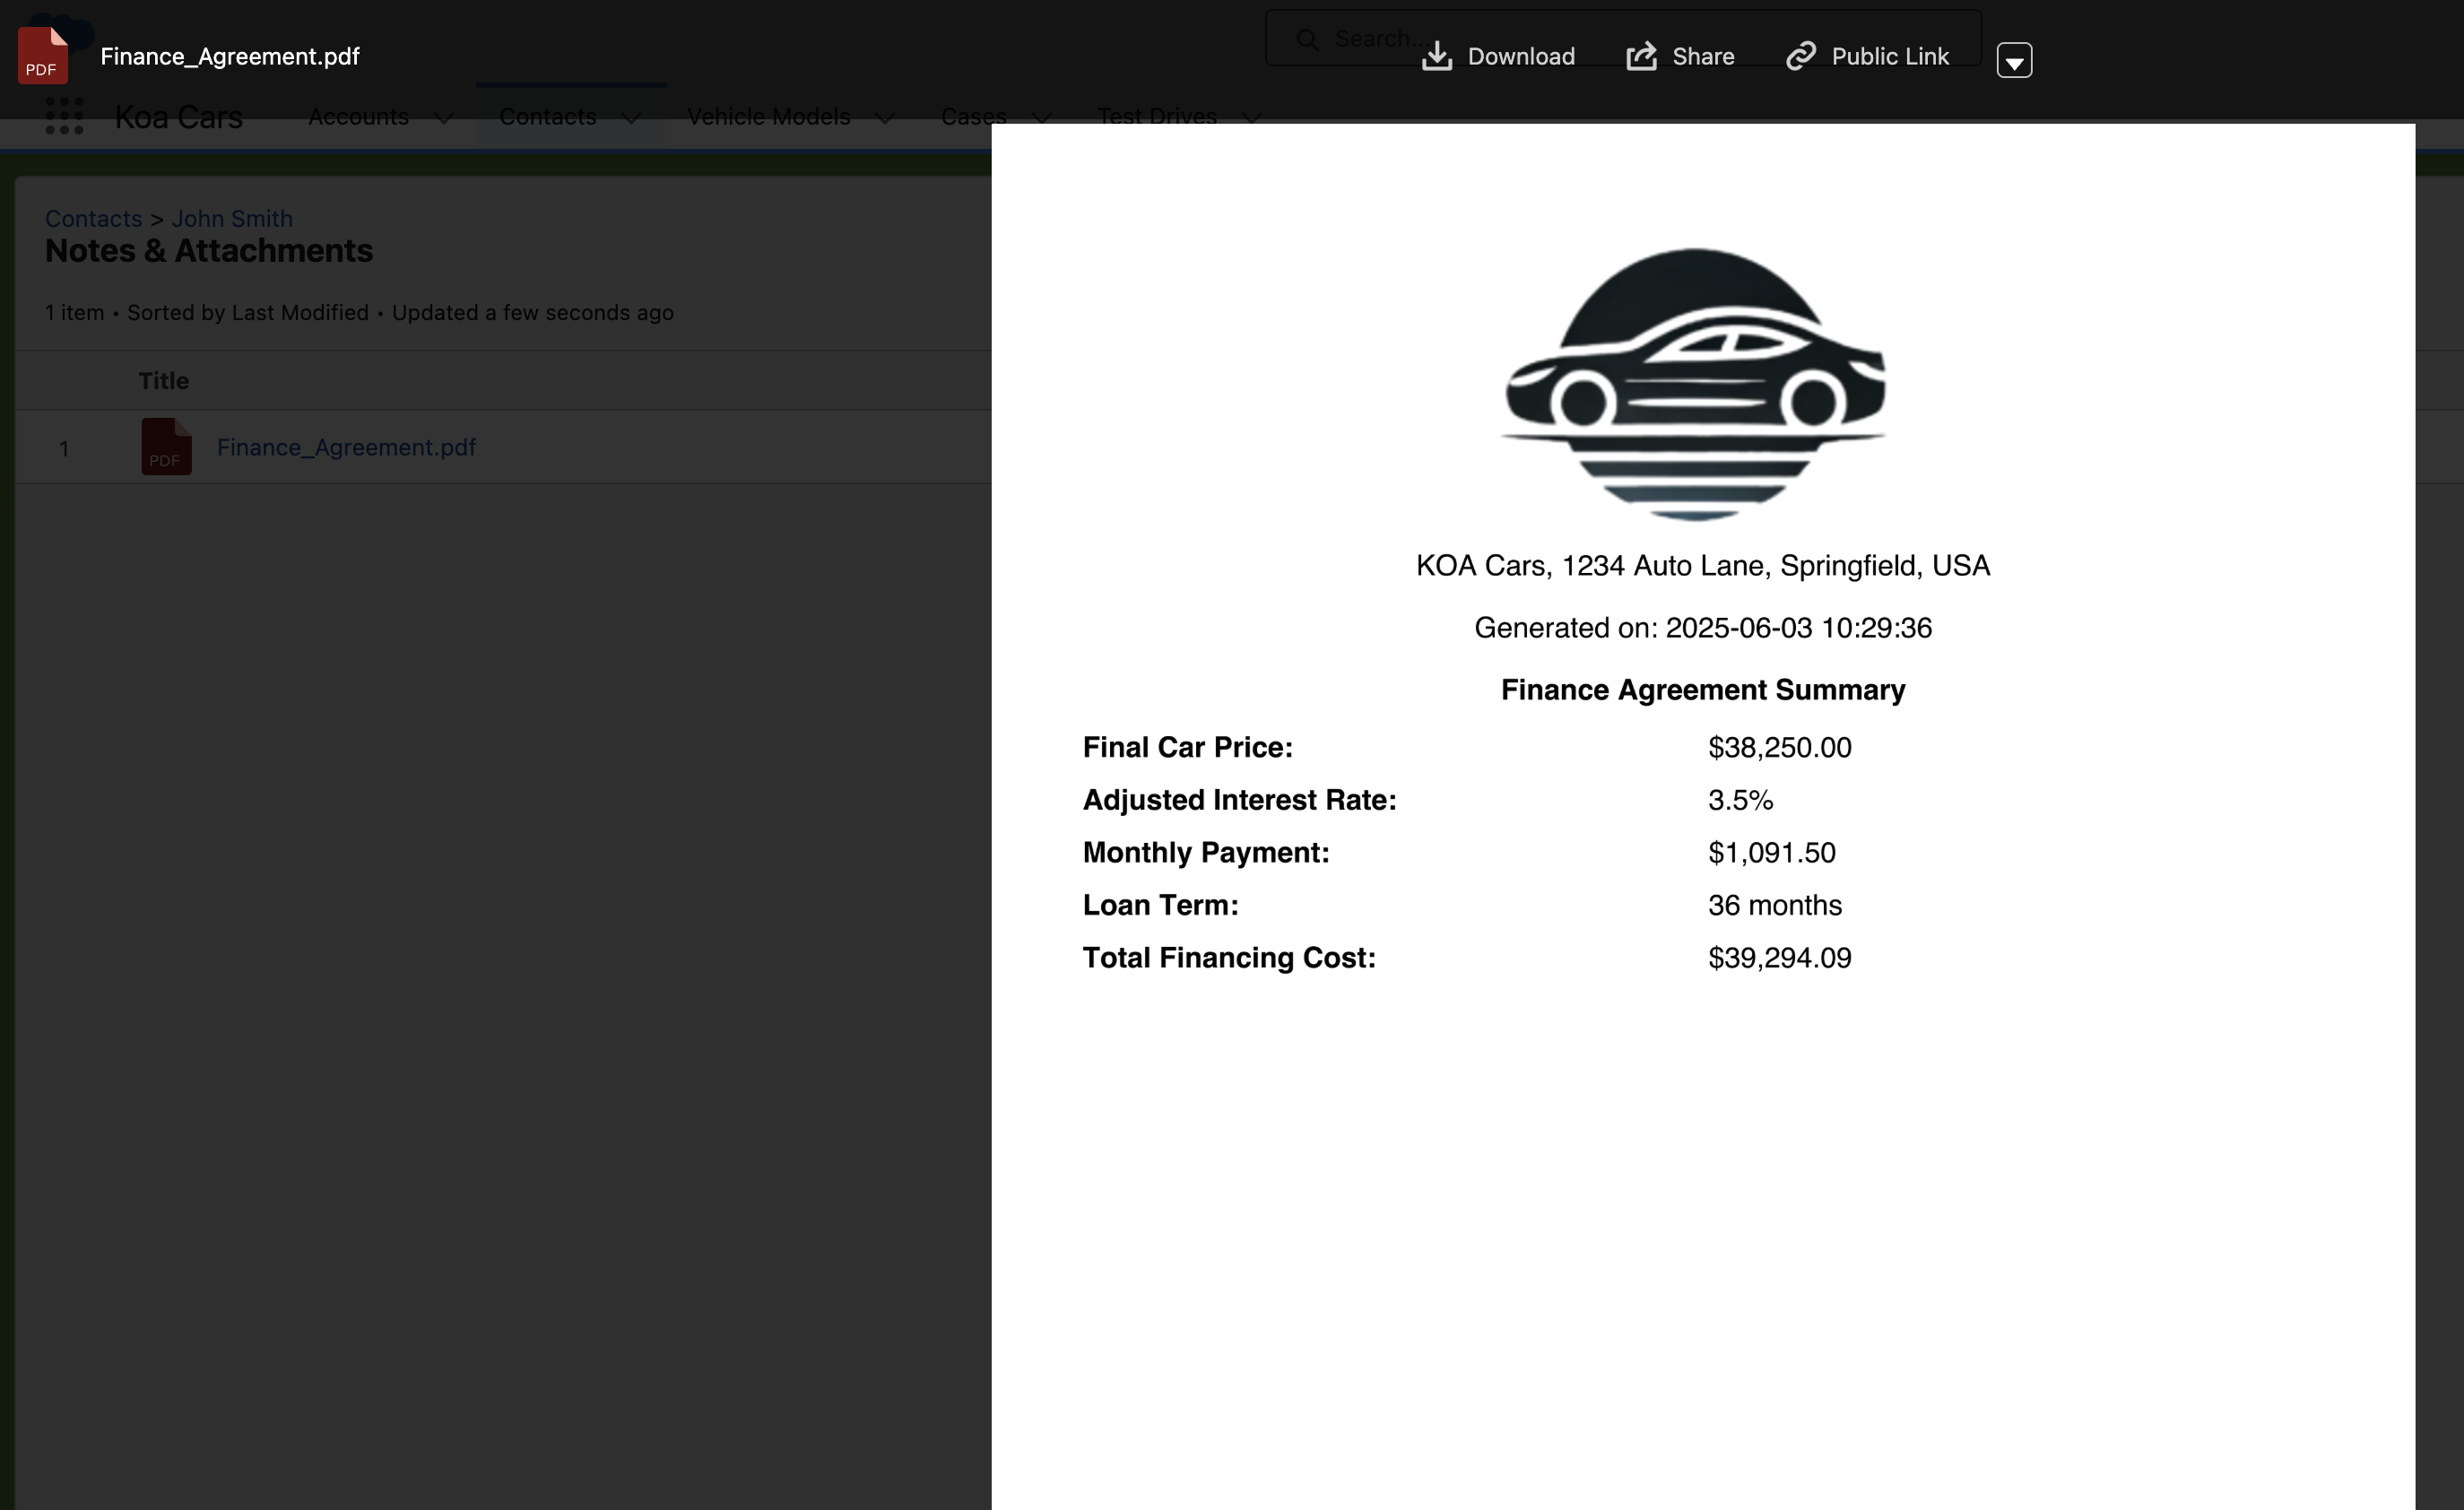
Now you can see how the Heroku application is called from Agentforce to provide a finance agreement estimate and generate a PDF.